Tuesday, September 25, 2012

Changing the rear door speakers on a 2005 Volvo XC70

Last weekend I chose to change the rear speakers on my XC70. The speakers still worked fine, they just weren't crisp enough (at least in my opinion). So, I went on Amazon and bought a pair of 6.5" Pioneer speakers. What a difference they make.

Materials required:

6.5" Speakers (any brand is fine)
A torx bit set with bits ranging from 10 to 30
A small flat head screw driver
A set of pliers
A corded or cordless drill with a 1/8" bit for steel

1. The door panel must first be removed. As you can see, there are plastic riviets surrounding the edge of the interior door panel. Use a flat head screw driver to pry them out. You can click on any of the following photos to enlarge them.


2. Locate this cover in the interior side of the panel. Its right inside the door handle pocket. use your small screw driver to pry it out. Then use a T25 bit to uncrew the final bolt.

3. Grab the door handle pocket, and lift the interior panel up. The panel has a lip on the inside that slides next to the glass. Make sure to not move it too high, because we must now disconnect it.
4. take your screw driver and pry the plastic cover that holds the door release cable. Be careful to not break it!
 5. This is the switch that makes the glass go up or down. take your screw driver and pry the clips open. Once free, wiggle the switch out.
Here is the switch, freed from the panel:
 6. Next, take your drill and drill out the rivets that hold the speaker in place. Once drilled, just tug hard and the speaker should give way. There is a connector, disconnect it to remove the stock speaker and its housing.
 Here is the new Pioneer speaker vs. the stock Volvo speaker. Notice how the pioneer has a rubber filter vs.  the Volvo's paper one. Rubber filters make a clearer sound.
7. Take your pliers and pull the connector free from the old speakers wires. You will need this.
 8. Connect the wires to your new speaker. Remember black goes to ground, and red / white goes to the positive terminal.
 9. You can simply crimp the wires together like I did, or you can solder them together for better sound quality. I took the panel off again to solder them, just to make it a better connection.

 10. Put your new speaker in the old speaker hole. Mark the holes where the screws go in. Take your drill and drill in the new holes.
 11. Take your screws and fasten the new speaker in.
 12. Now its time to reconnect the door panels electrical and door release connections.
 13. Now snap in the door cable back in place.
14. Now all you have to do its refasten the door panel to the metal exterior panel. Once your done, test it out. If you hear noise from the speaker, your done! If you dont, switch the wires, your polarities are wrong.


Tuesday, September 18, 2012

Changing the coolant on a Volvo 850 / T5-R

This weekend I took the liberty of changing the coolant in the T5-R. The process is the same for all 1993 to 1997 Volvo 850's / Volvo T5-R's. First you will need several materials:

Car wheel ramps or Jack Stands (I prefer wheel ramps)
A 10mm open ended wrench
A 13mm open ended wrench
4 liters of deionized water
8 liters of 50/50 premixed coolant (I recomend Prestone 50/50

optional: Drainpan and new radiator drain plug

Prerequisites: A level driveway or work area, cold engine

Step 1: drive the car up onto the ramps, or if you have jackstands, jack up the car and place a jackstand beneath the driver and passenger side subframe.


Step 2: Open your hood by releasing the latch near the driver side kick panel, then release the latch on the hood.

Step 3: Open the coolant cap. It is located inside the engine bay on the left.


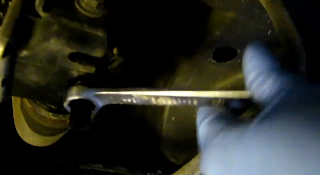
Step 4: Go underneath the front of the car and remove the splash guard. It is held on by two 10mm bolts.

Step 5: After the splash guard is removed, locate the radiator drain plug. Looking at the front of the car, it is on the left side on the bottom of the radiator.

 Step 6: Take your 13mm wrench and loosen the drain plug. Be careful to not use too much pressure. It is made of plastic, and may break easily if forced too much.

Step 7: Unscrew it by hand.
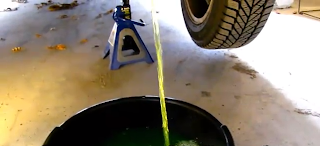
Once unscrewed, allow the coolant to drain. I chose to drain into a drain pan, but it not nessecary. Approximately 6 liters of coolant will come out.
Step 8: Locate the engine drain plug. It is located right above the passenger side halfshaft. Loosen it with your 13mm wrench. You can choose to use a hose so that is will flow cleaner, but with my driveway and slight incline, I managed to catch 90% of it. About 1 liter will drain out.
Step 9: Retighten your engine drain plug and radiator drain plug.

Step 10: Add 4 liters of deionized water to your coolant resevoir. Refer to step 3 for resevoir location.

Step 11: After the water has been added, start your Volvo. Allow the engine to run for 2 minutes. In this step, the water pump is circulating the water through the cooling system, taking any old coolant along with it. After 2 to 3 minutes, shut the engine off.

Step 12: Open up your radiator drain plug again. You will notice the fluid is clearer than before, meaning the water has flushed the old coolant out. Four to 4 1/2 liters will come out.

Step 13: Close the drain plug. Its now time to add the new coolant.

Step 14: Reinstall the splash guard. We are finished draining fluids.

Step 15: Take your coolant and slowly add it to the coolant resevoir. You will notice the tank will fill up, then slowly go down. Keep adding coolant till the level normalizes. The ammount of coolant that the engine will take is anywhere from 7 liters for the non-turbo Volvo 850's, to 7.4 liters for Turbo models / T5-R.


Step 16: Now it is time to burp the system. Air pockets may have formed while refilling the system. Leave the coolant cap off and hood open.

Step 17: Start your car.

Step 18: Let the engine run till the temperature gauge (the temperature gauge is to the right of the fuel guage, as shown in the picture below) hits the middle area of the gauge. Once it does, allow the engine to run for another 2 minutes. The engine is approximately 210° fahrenheit.


Step 19: The coolant level will drop. Add enough coolant so that the level is near the "MAX" marking on the resevoir. Congratulations, your done.


Thursday, September 13, 2012

the vehicles TVWM will be covering in all our posts

To avoid any confusion, I am informing everyone that the two vehicles I will be performing maintenece and repairs on will be a 2005 Volvo XC70...

 ...and a 1995 Volvo T5-R.
Both vehicles are mechanically similar to their older and newer model years. The XC70 had the same overall design between model year 2001 and model year 2007. The Volvo T5-R is simply a high performace version of the Volvo 850. The T5-R (read: 850) is basically unchanged from 1993 to 1997. Any advice or instructions on this blog should be exact, unless otherwise specified.

Welcome to The Volvo Weekend Mechanic!


Welcome to my blog! Here you will be able to learn Volvo maintenence, anywhere from simple maintanence all the way up to a complete engine rebuild! Not only will Volvo maintence be covered, but general automaintence will be covered as well.