Thursday, November 29, 2012

Replacing the dimmer switch in your Volvo 850 / S70

Volvo 850's / S70's that were made in 1995 up to 1998 are starting to show their age, with several parts that need to be replaced, due to age. One of the parts that is notorious to fail due to age is the dimmer switch located on your dashboard, to the left of the instrument panel. A symptom of a failing switch is most noticeable when driving at night. The instrument cluster may be very dim, then the brightness may adjust its self with out you even touching the dimmer. This is a very simple job to do, and can be done in less than 5 minutes.

Prerequisites:
Flat head screw driver
A towel or something soft
A marker or something to pry against
New dimmer switch

1. Locate the dimmer switch. It is right next to the instrument panel, next to the fuel gauge. Its also above the rear foglight switch, if equipped.

2. Take your towel and screw driver, and pry the foglight switch out, starting at the bottom. On cars not equipped with foglights, there is a "dummy" plastic cover here. All you have to do is pry it out. One you have part of the switch or cover out, you can remove it with your fingers.


3. You can just let the foglight switch hang loosely (if equipped).


4. Onto the dimmer switch. using your marker or appropriate prying tool, put your flat head screw driver in the back lip of the dimmer switch. Pry it out towards you.


5. Once the switch is out, use your flat head screw driver to pry the two clips holding the dimmer switch in place with the electrical connector.


6. Get your new dimmer switch and snap it into the electrical connector.

7. Push the dimmer back into its appropriate location.

8. Push the foglight switch back into place, or snap the dummy cover back into its location. Your finished!

Replacing or installing a cabin air filter on your Volvo 850 / S70

Most Volvo's from the mid 1990's up until present have something called a cabin air filter installed somewhere near the front of the passenger air bag. This filter acts as an air filter, and filtrates the air that comes into the cabin of the car whenever the A/C or heat is on. Over time, this filter can clog up with debris such as leaves, dirt, dust, etc. This tutorial will show you how to change your filter, and will also show you how to install one if your car doesn't currently have one.

Prerequisites:

T25 torx head driver
New cabin air filter
(optional) cabin air filter mount

1. Open the engine bay by pulling the red lever on the left side of the drivers side kick panel.

2. Locate the air breather hose on your car (if equipped) and disconnect it as shown in the picture below.


 3. Use your T25 Torx head driver and remove the two screws holding the plastic flap down, circled in yellow in the picture below.


4. Pull the flap foward and lift up. Then remove the cabin air filter. (If equipped)


As you can see on this 850, the cabin air filter was almost completely disintegrated. 

 (Optional Step) If your car doesn't have a cabin air filter mount installed, one can be purchased at your local Volvo dealer for about $25. All you have to do is slip on the mount onto the existing rectangular tube.

5. Place your new filter in the mount. If you have a genuine Volvo air filter, place the filter with the tab facing towards the front of the car. This tab snaps in and insures a tight fit. Several aftermarket filters, are cheaper and don't have this tab, which doesn't really matter, it just makes the filter more secure.

 6. Make sure the filter is set into place and isn't binding on anything.


7. Lower the plastic flap on top of the air filter. Make sure that you slip the flap underneath the weatherstripping, or else you will get leaks in your air filter, which can lead to mold and musty scents in your A/C / heating system.

8. Tighten the two T25 bolts so that the plastic strip is snug. Your finished!

Tuesday, November 13, 2012

Changing the front oxygen sensor on a 1995-97 850

Oxygen sensors (also known as 02 sensors for short) are sensors placed inside the exhaust system of most cars made after 1985. Volvo also employed these sensors. The purpose of 02 sensors is to determine the ratio of oxygen to carbon monoxide from the vechicles emissions. reading the amount of oxygen makes the 02 sensor send information to the engine to make it inject more fuel (creating a "rich" combustion) or to make it inject less fuel (creating "a lean" combustion). A rich situation makes the engine burn more fuel than nessecary, reducing fuel economy. A lean situation burns too little fuel, increasing risk of engine damage and reducing power output. For most Volvo 850's, many 02 sensors are the original sensors from 15 to 18 years ago. If you feel the engine running strange or a "surging" sensation during acceleration, have a check engine light, or if by reading your engine codes with an OBDII code scanner you read a lean or rich condition, you may need to replace your O2 sensor.

Tools needed:

ramps or jack stands
needle nose pliers
3/8" socket wrench
10mm socket
12mm socket
21mm box end wrench
WD40 or equivilent penetrating oil.

(1.) Optional first step: Since 02 sensors are close to the asphalt and are subjected to rough, moist conditions, you may want to soak the 02 sensor in WD40 to loosen the rust. A rusty 02 sensors can increase the risk of rounding off the 02 sensor bolt, which makes extraction more difficult.

(2.) Drive the front of the car up unto ramps or use a jack and jack stands to prop up the front of the car.

(3.) Go underneath the car and unplug the O2 sensor, as shown below. It is located about 4' away from the front of the car.


In this picture, you can see that it is located near the exhaust manifold. You may need to remove the cross brace. I managed to remove my oxygen sensor without taking out the brace.

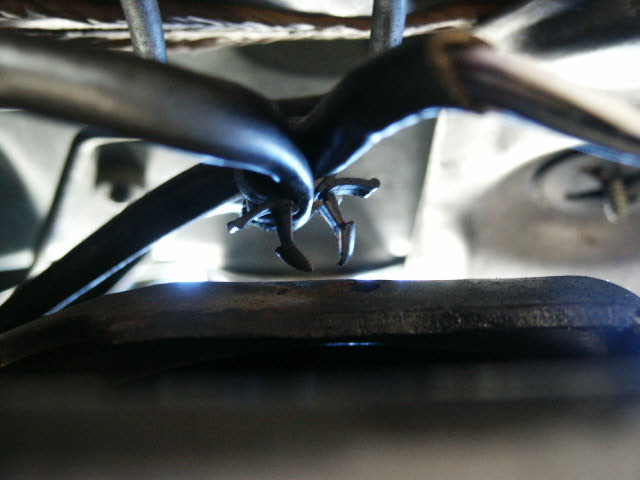
(4.) Use a pair of pliers and pull out the clip that holds the 02 sensor wire in place. It is plastic, and due to age and heat, may be brittle. Carefully remove it, or just buy a replacement clip.
(5.) Here is the 02 sensor. Use a 21mm box end wrench or a specialty 02 sensor flared wrench to remove it. If you have coated it in penetrating oil as stated before, it should come out easily. If not, be careful to not round off the edges of the hex head, or you may have to drill it out.
(6.)Here is the new O2 sensor installed. Installation is the reverse of removal.

(7.) Once the new 02 sensor is installed, use your scan tool to read the engine codes. If any codes are found, erase them. Now your done!